|
I worked on the kitchen shown below before Christmas. She called me back to do the back splash now. This was the wonderful lady who called the wrong number for a contractor to bid on her kitchen and ended up with me. I don't think that this other guy has called her back yet even and I've had 2 jobs from her. His loss. She is just a peach and one of my favorite customers. This is glass mosaic tile. It was about $9.00 a 12" x 12" sheet plus thinset and grout. Not really a do-it-yourself job if you don't have a diamond blade for a grinder and a grout float. The sheet tile were pretty easy to install and were a bit forgiving on this slightly uneven wall. It will need to have the grout sealed in the next week or so after the grout cures. This will help keep the grout joints looking new and make it easier to clean. That part is a very easy DIY job and better off left to the customer. No sense in calling me back to do this easy job. Besides, it should be done every so often anyway. This is a good time to replace the old dirty outlets. We did that on this job too. Man it looks nice. The photos don't do it justice. Since it is glass tile you can actually look at them and almost seem to see through them. This is one reason to use WHITE thinset as it will reflect the light back out. The joint at the countertop is a caulked grout joint. Special sanded caulk to match the grout. This "gives" a little with any movement of the counter top due to slamming doors, dropping things on it, or movement in the floor. She will enjoy this for YEARS now. Up next... BATHROOM! 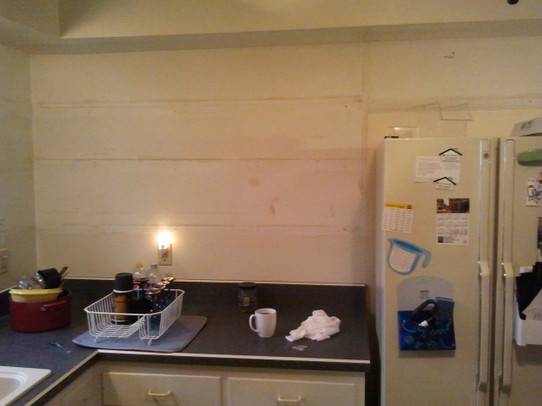 Here is the kitchen prior to new cabinets. 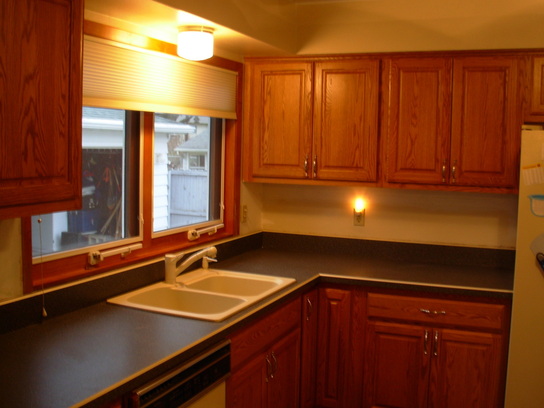 Here is the kitchen with new cabinets. But we are not done just yet. 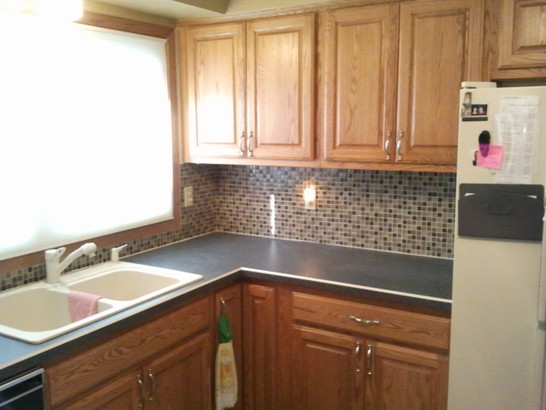 Isn't it amazing what a mosaic tile back splash can do for a kitchen?  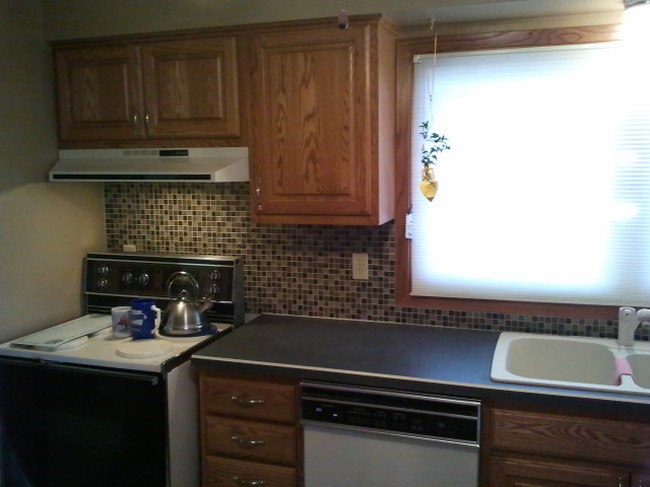 This week I did an extensive refresh to a 2nd floor master suite. Stripped the wall paper, prepped the existing trim and walls for new paint, added trim that was missing. This room just wasn't helping all the rest of the improvements we did to the home to sell it. 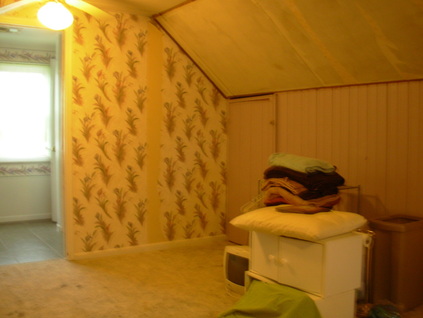 Here is the room before. Ugly, torn wallpaper and a color scheme that just wasn't working. Missing trims and dated fixtures. 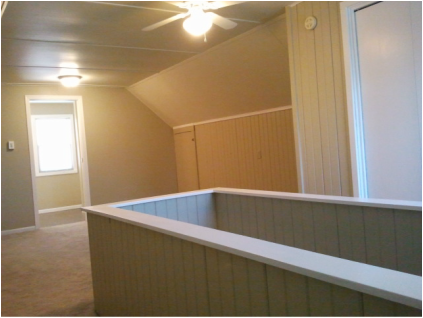 BAMM! (borrowed from Emeril) A grey/green paint with the darker shade on the bottom and the lighter on the slanted and flat ceiling. The trims were all caulked and painted to give it a professional quality finish. We picked the light color first and then stayed on the same card for the accent. This is a pretty good rule of thumb to follow when selecting multiple colors in the room. 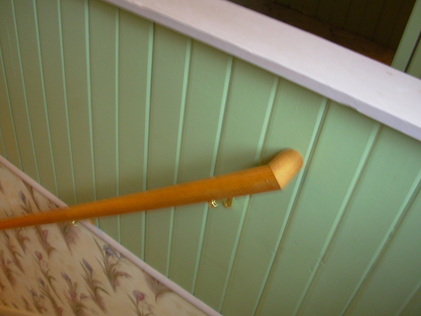 Check out the trim and the accents on this knee wall. 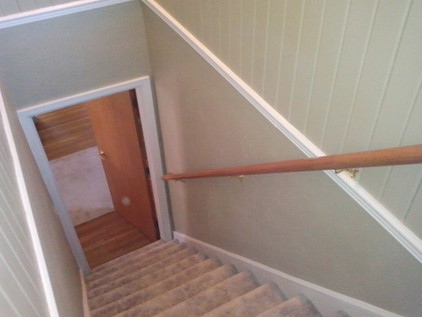 New chair rail trim and white accent paint gave this 1940s home a real sprucing up. Bye, bye wall paper. 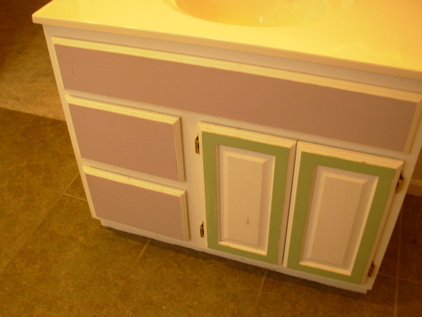 Before..... 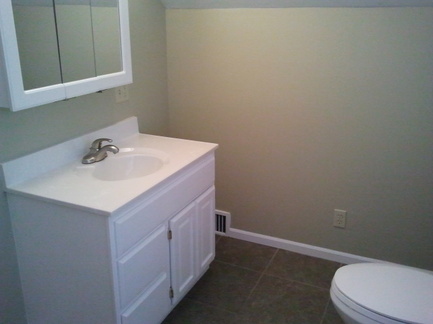 After.... simple and clean. Ready for a new owner to decorate with their own items, not a paint can.
All of the walls were primed first to ensure that the old color would not bleed through and that the new coats of paint would stick. The primer also seals in any pet odors. 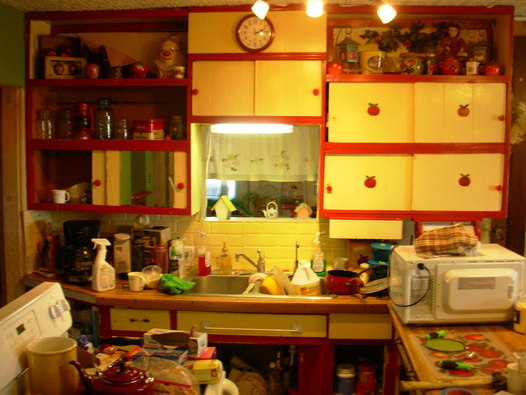 I was hired by a family to "gift" a new kitchen to a relative. This really kind of turned into our own little version of "Extreme Home Makeover". You could actually see into the walls from inside the cabinets. This lady deserved it and what a wonderful gift to get from her family members. Everyone chipped in and also worked on parts of this project. I was in charge of coordinating and repairing walls, ordering new cabinets and installing the finished product and other carpentry. Above is the kitchen "BEFORE" we started. 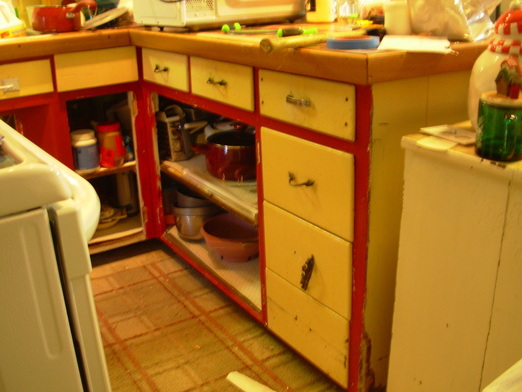 The drawers were in such bad shape that you couldn't even open them. The handles, and in some cases the entire drawer front, would just pull off. The doors just fell off too several years ago. The counter top was de-laminating and wasn't the best thing to prepare a meal on. 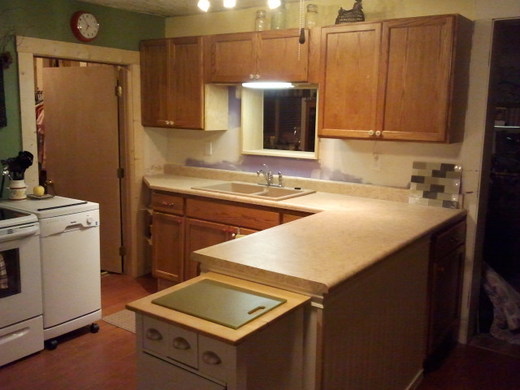 This is the finished product. To save money we got basic unfinished stock cabinets from the local home store and the family finished them. The cabinets didn't have all the bells and whistles that your usual garden variety cabinets but as you can see this was a DRASTIC improvement. The "tile" you see on the right hand end of the counter will be the tile that the owner will apply as a back splash. The "window" above the sink and the door and trim on the left will be painted too by the family. We were going for a kind of upgraded country kitchen look. The rest of the room has white wainscoting like you see on the back of the peninsula cabinets. I installed a new door to a laundry room / bathroom on the left that will be redone in the future. 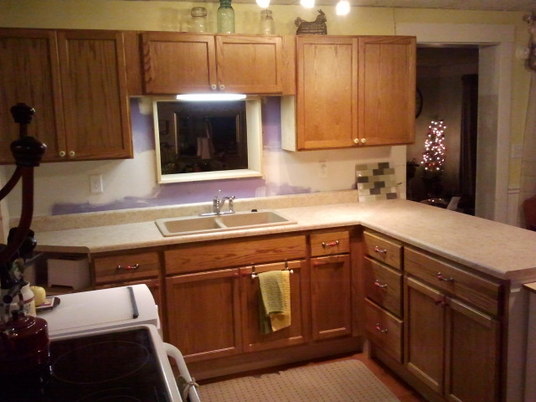 A new laminate wood floor was installed by a family member to really finish off this space. The "purple" you see on the wall is the drywall board. It is a mildew and mold resistant product. This is the best thing to put in these old homes and ESPECIALLY in a kitchen and bath. It may cost a few dollars more per sheet, but we only needed 3 sheets. It will be worth the investment. She is going to LOVE this finished product. It was so much fun to see her eyes light up each day when she would come home and see the transformation. I can't wait to hear from her tomorrow after she gets home from her second shift job and sees this. It is all cleaned up and ready to bake cookies with the grand kids again. It is worth all the long hours on this project to see it finally done and usable again.  If you would like to discuss some kitchen options in your own home don't hesitate to contact me. Not every kitchen has to look like HGTV. As you can see "simple" can be a definite upgrade. It is amazing how something functional can just make a person feel better too. Trust me. It was magical.
I was recently hired to "refresh" parts of a cute home so it could be put on the market. The original wish list of things from the owner would have put the bill over$28,000 but after pairing down the list to just major work in 5 rooms and some other minor things we got the bill down to under$8,500 and 3 weeks of work for yours truly. This home even had the ducts professionally cleaned while I was there - and man did it need it. 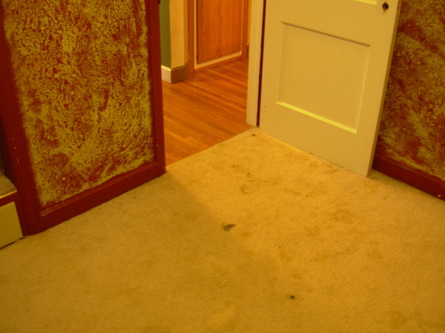 The "textured" paint on the walls was a result of way too much HGTV influence and not enough proper technique and product. They tried to do this over old wallpaper and wondered why it started to peel off the wall. The paper was not primed first with an oil base paint. This would have prepared the surface to accept paint if the paper was properly adhered. As for the red paint, well, a good coat of oil base primer will seal in that color and allow a nice new WHITE color to adhere to it. As for the carpet, well; it was DOA - " doing over anyway". This was so full of "cat" that the oak floor under it had to be painted and sealed just to make the house habitable - well, at least get rid of the odor. 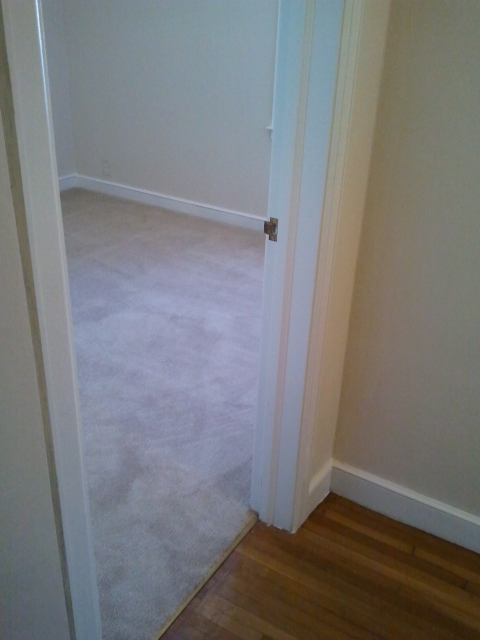 Here you see the same area, but with new paint and texture. The trim was painted with a fresh coat of primer and semi-gloss paint and all joints caulked for a beautiful new look. I have to give the previous owners an "A" for wanting to create a new and unique look, but not with the products and techniques they used. Be bold with your decorative items like rugs, pictures, shelves. Leave the wild paint schemes to HGTV and their crazy renovations. This stuff does not have resale value and really only hurts your asking price in my opinion. But hey, gives me plenty of work to do. 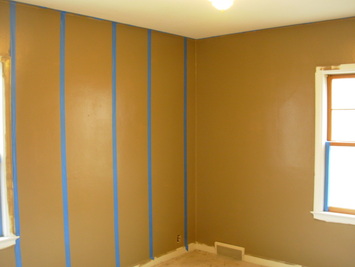 Here we see a nice neutral color, but the intent here was to add stripes. The blue tape would create that effect, but the blue tape would allow the next coat of paint to bleed through on the edges and not have a crisp line. It also peeled off the layer of paint under it because it was not primed prior to painting. You could also see where the paint was splotchy on the white trim because that was not primed to "dull" the glossy surface and allow a good adhesion for the new paint layer. This entire room had to be primed (floor too again) and repainted. The new green "Frog" tape should be used if you were going to create stripes and crisp lines. When applied the edges seal once the new paint hits it. Be careful in your planning and timing of your project. This tape can only be left on the walls for a short period of time. Otherwise it bonds to the surface. PLANNING - very important to a project. 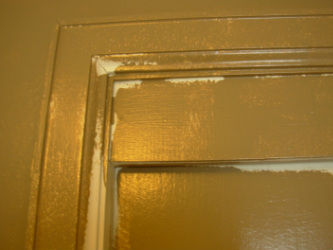 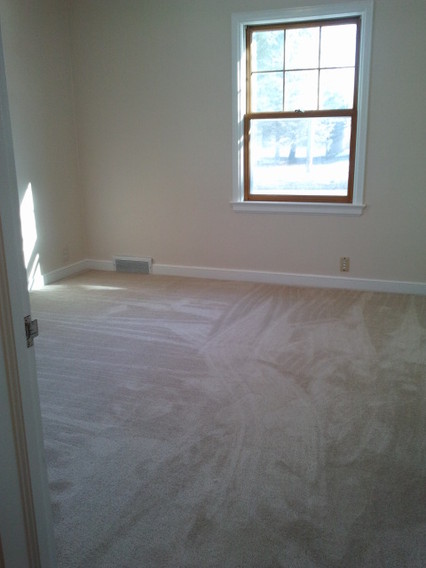 Proper products, technique, and PATIENCE will always give a great looking finished product. For the extra $45 in primer to do this room and about 8 hours it looks great and would have been a result the previous owners would have enjoyed. 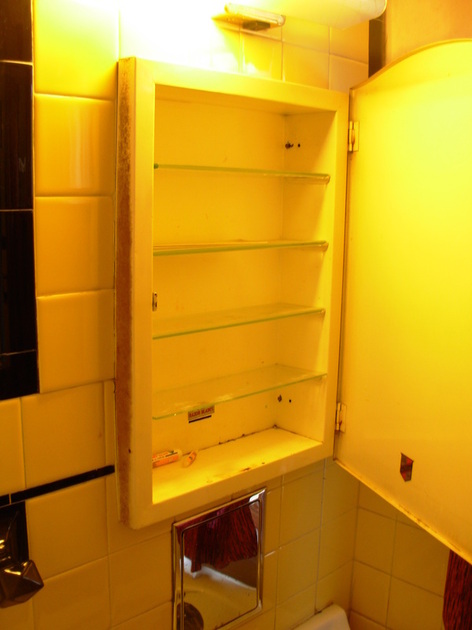 Why buy new when a $4 can of spray paint can turn an ugly old beveled glass medicine cabinet into something that can be reused? My 12 year old son Michael was helping me that day and said, "Dad, look. It has a slot for used razors to go in. It also had a stamp on it that said it was made right here in Waterloo, Iowa. We have to save this. It has history." Classic! It had to be restored. 15 minutes later and this cabinet was ready for another 70 years of service. We even saved the "Made in Waterloo Iowa" sticker. He was so proud of that find. 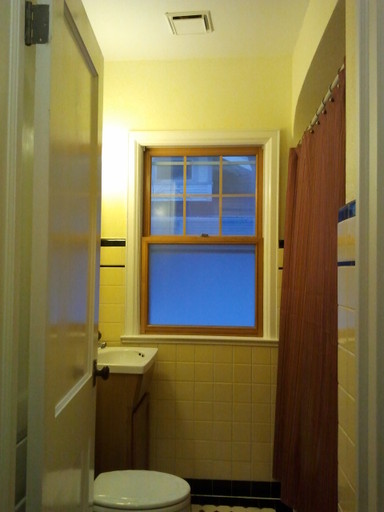 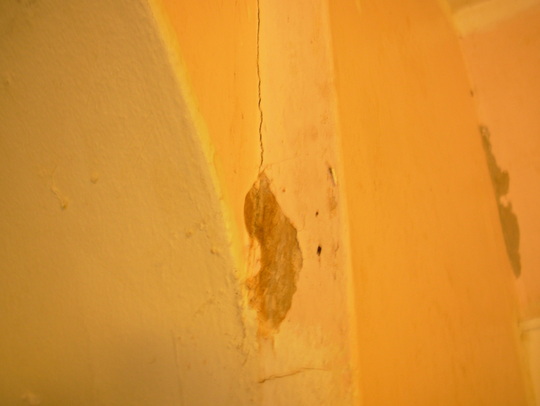 Let's face it, plaster and old paint will eventually crumble and peel, and in a bathroom it will happen faster. Preparing the surface with a good adhesion primer will seal that surface from moisture, and give a good bond to the spray texture for an updated look. I even sealed the texture with another layer of primer so that the finish coats of paint would bond well. This plaster is ready for another 70 years of service to this bathroom now.  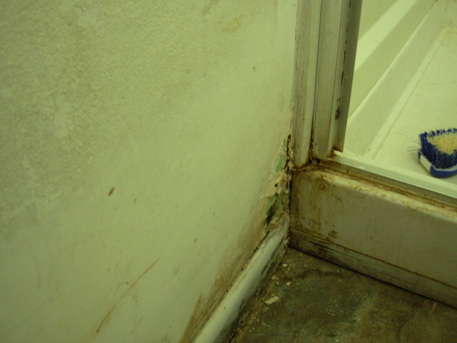 Here we see why you need to do regular maintenance to a home. Sealing joints. Touching up paint. Keeping the place dry by running the exhaust fan (if it is properly vented to the outside of the house) can help prolong the finishes in your home. This area was repaired with mold/mildew resistant joint tape, drywall compound, primer, texture and more primer with the final finish coats of mildew resistant paint. The joints were caulked and the leaky shower door repaired. Using a good quality 25 year caulk can help make all the difference in the world. Proper products and technique again. You just have to do it. Rome wasn't built in a day and you will not repaint a bathroom properly in a day either. This was a 6 day process. While every working hour of those days was not spent on this room, it still takes time for things to cure and dry. Cutting corners just messes up your final product. Below you can see what a little time, the proper products, and a little bit of Jonny B. can do for a crappy wall. All fixed and looks like new. 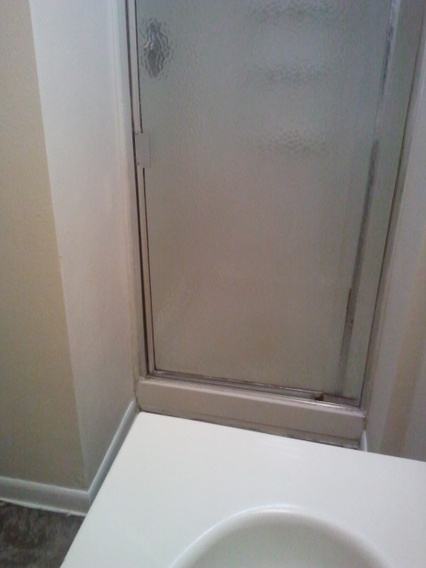 If you like what you have seen here let's talk about how I can help you do your next renovation project - do it the right way for longer lasting results that you can be proud of. Not everyone knows everything, and that is OK. So if you don't know why you should do some of the things I have mentioned here maybe considering calling me so your efforts don't wind up like the ones that I had to fix. It is just a waste of your money and time to do it wrong and to top it all off you have to live there too and see it everyday.
|
Hitting Home BlogAuthorJon Bronemann - author of "The Hitting Home" blog. Check it out and you will see what I see everyday and why hiring a quality contractor is so very, very important. Seeing is believing and it really does "Hit Home". Archives
December 2023
Categories
All
|


 RSS Feed